Tutorial: Getting Started
🎧
Audio Guide
1. Introduction
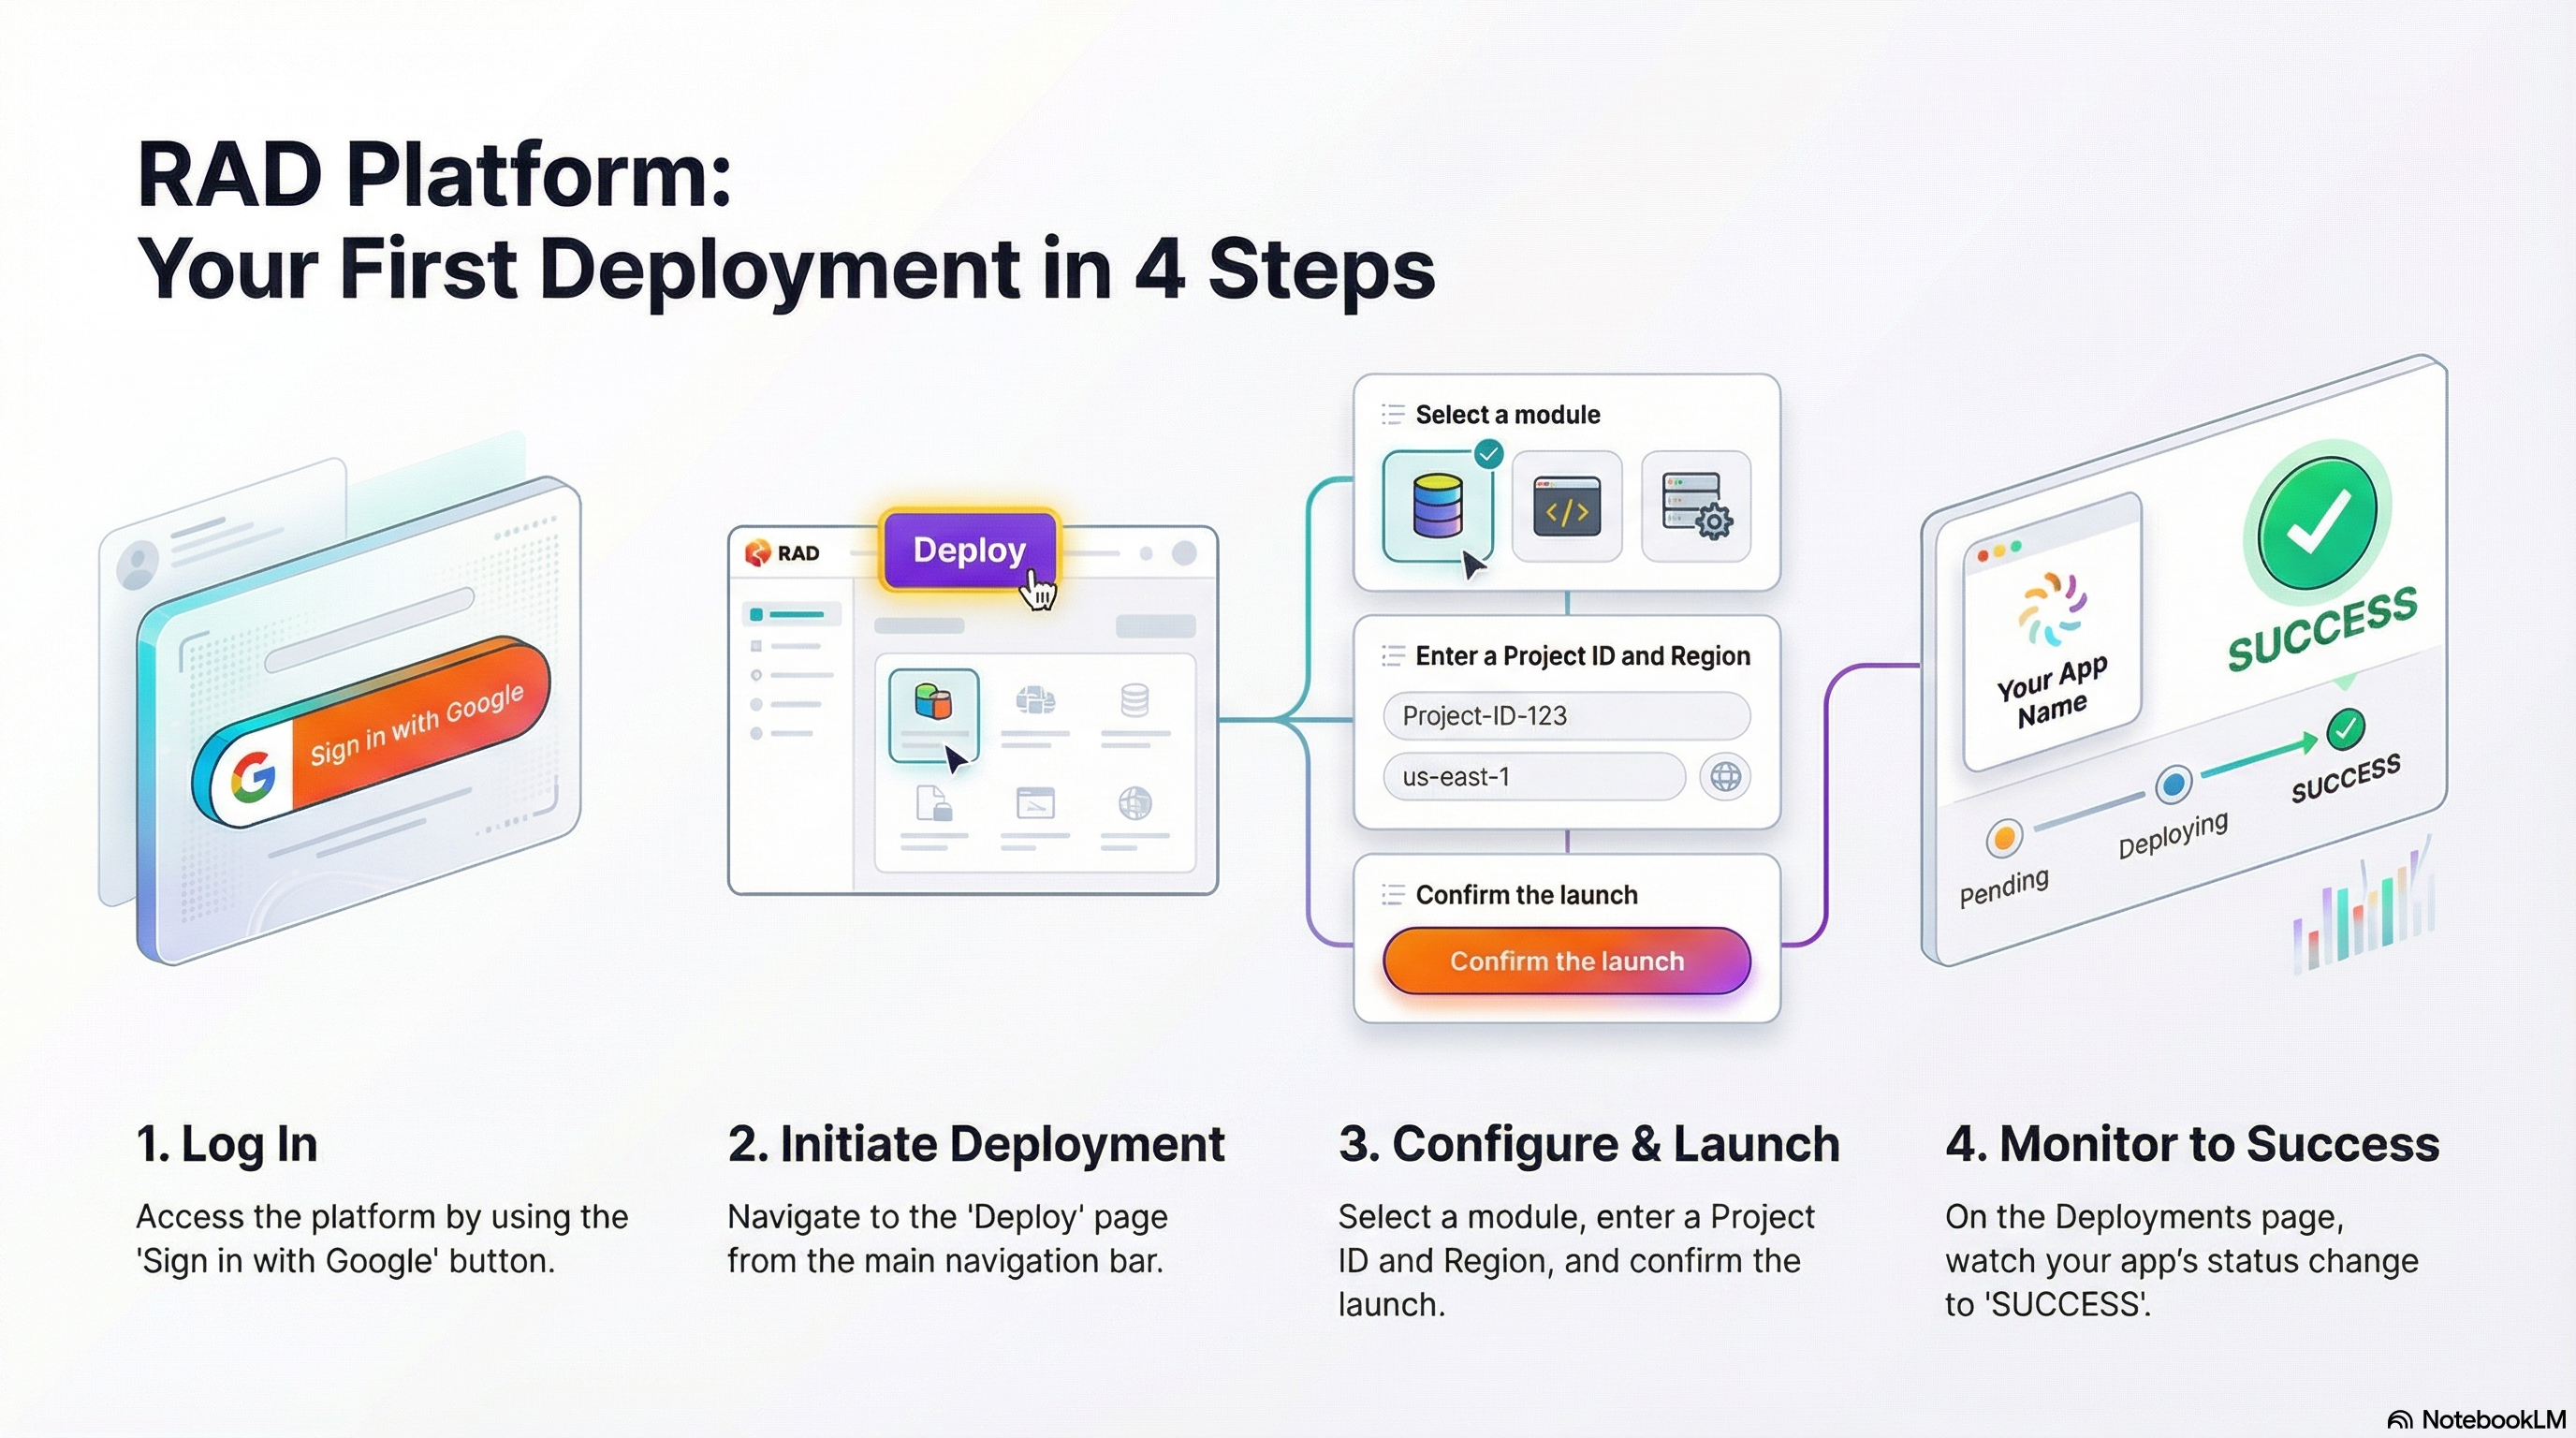
Welcome to the Rapid Application Deployment (RAD) platform! This tutorial will guide you through your first steps: logging in, exploring the dashboard, and deploying your first module.
2. Step 1: Login
- Navigate to the application URL.
- Click the "Sign in with Google" button.
- Enter your Google credentials.
- Success! You will be redirected to the Deployments page (or your role-specific home page).
- Tip: If you are a new user, check your notification area—you might have received free "Sign-up Credits"!
3. Step 2: Explore the Dashboard
The Deployments page is your main hub.
- My Deployments: This list is currently empty. It will show your apps once you deploy them.
- Navigation Bar:
- Credits: View your credit balance and transaction history.
- Deployments: Manage your running applications and view logs.
- Deploy: Go here to launch new apps.
- Help: Find guides, tutorials, and support.
4. Step 3: Deploy a Module
Let's launch your first application.
- Click Deploy in the top navigation.
- Ensure you are on the Platform Modules tab.
- Browse the cards or use the Search bar to find a module (e.g., "Simple Website").
- Click the card to start the configuration.
- Configure: You'll see a configuration form.
- Enter a unique Project ID.
- Select a Region (e.g.,
us-central1). - Note: The form may have multiple steps. Click Next to proceed through them.
- Click Submit.
- Confirm: Review the credit cost on the popup modal and click Confirm.
5. Step 4: Monitor Progress
You are now back on the Deployments page.
- Find your new deployment in the list.
- The status should be
QUEUEDorWORKING. - Click the ID: Open the details view to see more information.
- Watch Logs: You can view real-time logs as the system builds your app.
- Wait for the status to turn green:
SUCCESS.
Congratulations! You have successfully deployed your first module.