Partner Features
Audio Guide
1. Introduction
Welcome to the Partner Guide. As a Partner, you play a special role in the ecosystem. You have the ability to publish your own Private Modules and deploy them, in addition to the standard platform modules available to everyone. Your navigation bar includes Credits, Explore (if Jules AI is configured), Publish (once your repository is connected), Deployments, Deploy, ROI, and Help.
2. Setting Up Your Repository
Before you can publish modules, you need to connect your Git repository and configure your optional AI tools.
- Navigate to Profile: Click your avatar in the top right and select "Profile".
- Partner Settings: Scroll down to the "Partner Settings" section.
- GitHub Token: Enter a GitHub Personal Access Token. It must have
reposcope so the platform can read your private repositories. - Fetch Repos: Click the "Fetch Repos" button to retrieve a list of your repositories.
- Select Repository: Select the repository that contains your Terraform modules from the dropdown list.
- Jules API Key: (Optional) Enter your Jules API Key if you wish to use the AI-powered module refinement agent.
Note: The Publish link only appears in your navigation bar after your repository has been successfully connected. The Explore link (for Jules AI) appears only when both your repository and Jules API Key are configured.
3. Publishing Modules
Once your repo is connected, you can manage your module catalog.
- Go to "Publish": Click the Publish link in the main navigation.
- View Modules: You will see a grid of all valid modules found in the root of your connected repository.
- Search: Use the search bar to quickly find modules by name.
- Select: Click on the module cards you want to make available for deployment. Selected modules will be highlighted.
- Publish/Update: Click the button at the bottom of the page to save your selection.
- Publish: New modules will be added to the system.
- Update: Existing modules will be updated with any changes you've made to their code or variables in GitHub.
- Remove: Deselecting a module and clicking Update will remove it from the deployment list.
4. Refining Modules with Jules
If you have configured your Jules API Key, you can use the AI agent to improve your modules directly from the Publish page.
- Locate Module: Find the module you want to refine in the list.
- Click Sparkles Icon: Click the sparkles icon in the top right of the module card.
- Chat Interface: A modal will open where you can chat with Jules. You can ask it to refactor code, add features, or fix bugs.
- Commit: Jules will propose changes and, upon your approval, commit them directly to your GitHub repository.
You can also access Jules through the Explore page in your navigation bar, which provides a dedicated workspace for AI-powered module refinement.
5. Deploying Modules
You can deploy both platform modules and your own partner modules.
- Go to "Deploy": Navigate to the Deploy page from the main navigation.
- Browse Modules: You will see tabs for "Free Modules" (available to everyone) and "Premium Modules" (your private modules).
- Search & Pin: Use the search bar to find modules by name. Click the Pin icon on any module card to save it to the top of your list for quick access.
- Deploy: Select a module and configure its variables (e.g., Project ID, Region), review the settings, and submit to start the deployment.
6. Managing Deployments
View and manage your deployments from the Deployments page.
- My Deployments: See all your active and past deployments.
- Search: Find deployments by Module Name or Deployment ID.
- Monitor: Click on any deployment to view real-time build logs, status, and outputs.
- Rate: After a successful deployment, rate the module (1-5 stars).
- Delete: Remove a deployment and destroy its cloud resources.
- Purge: Force an immediate cleanup for stuck deployments.
7. Credits & Costs
Track your credit usage and project costs on the Credits page.
- Buy Credits Tab: Purchase additional credits via Stripe or Flutterwave (if enabled).
- Credit Transactions Tab: View a searchable, filterable history of your credit awards and usage. Export your transaction history as a CSV file.
- Module Costs Tab: See cost breakdowns by module across your deployments.
- Project Costs Tab: View detailed costs associated with your running projects.
- Project Invoices Tab: Access monthly invoices for your project costs.
- Subscriptions Tab: View and manage subscription tiers to receive monthly credit allowances (if enabled).
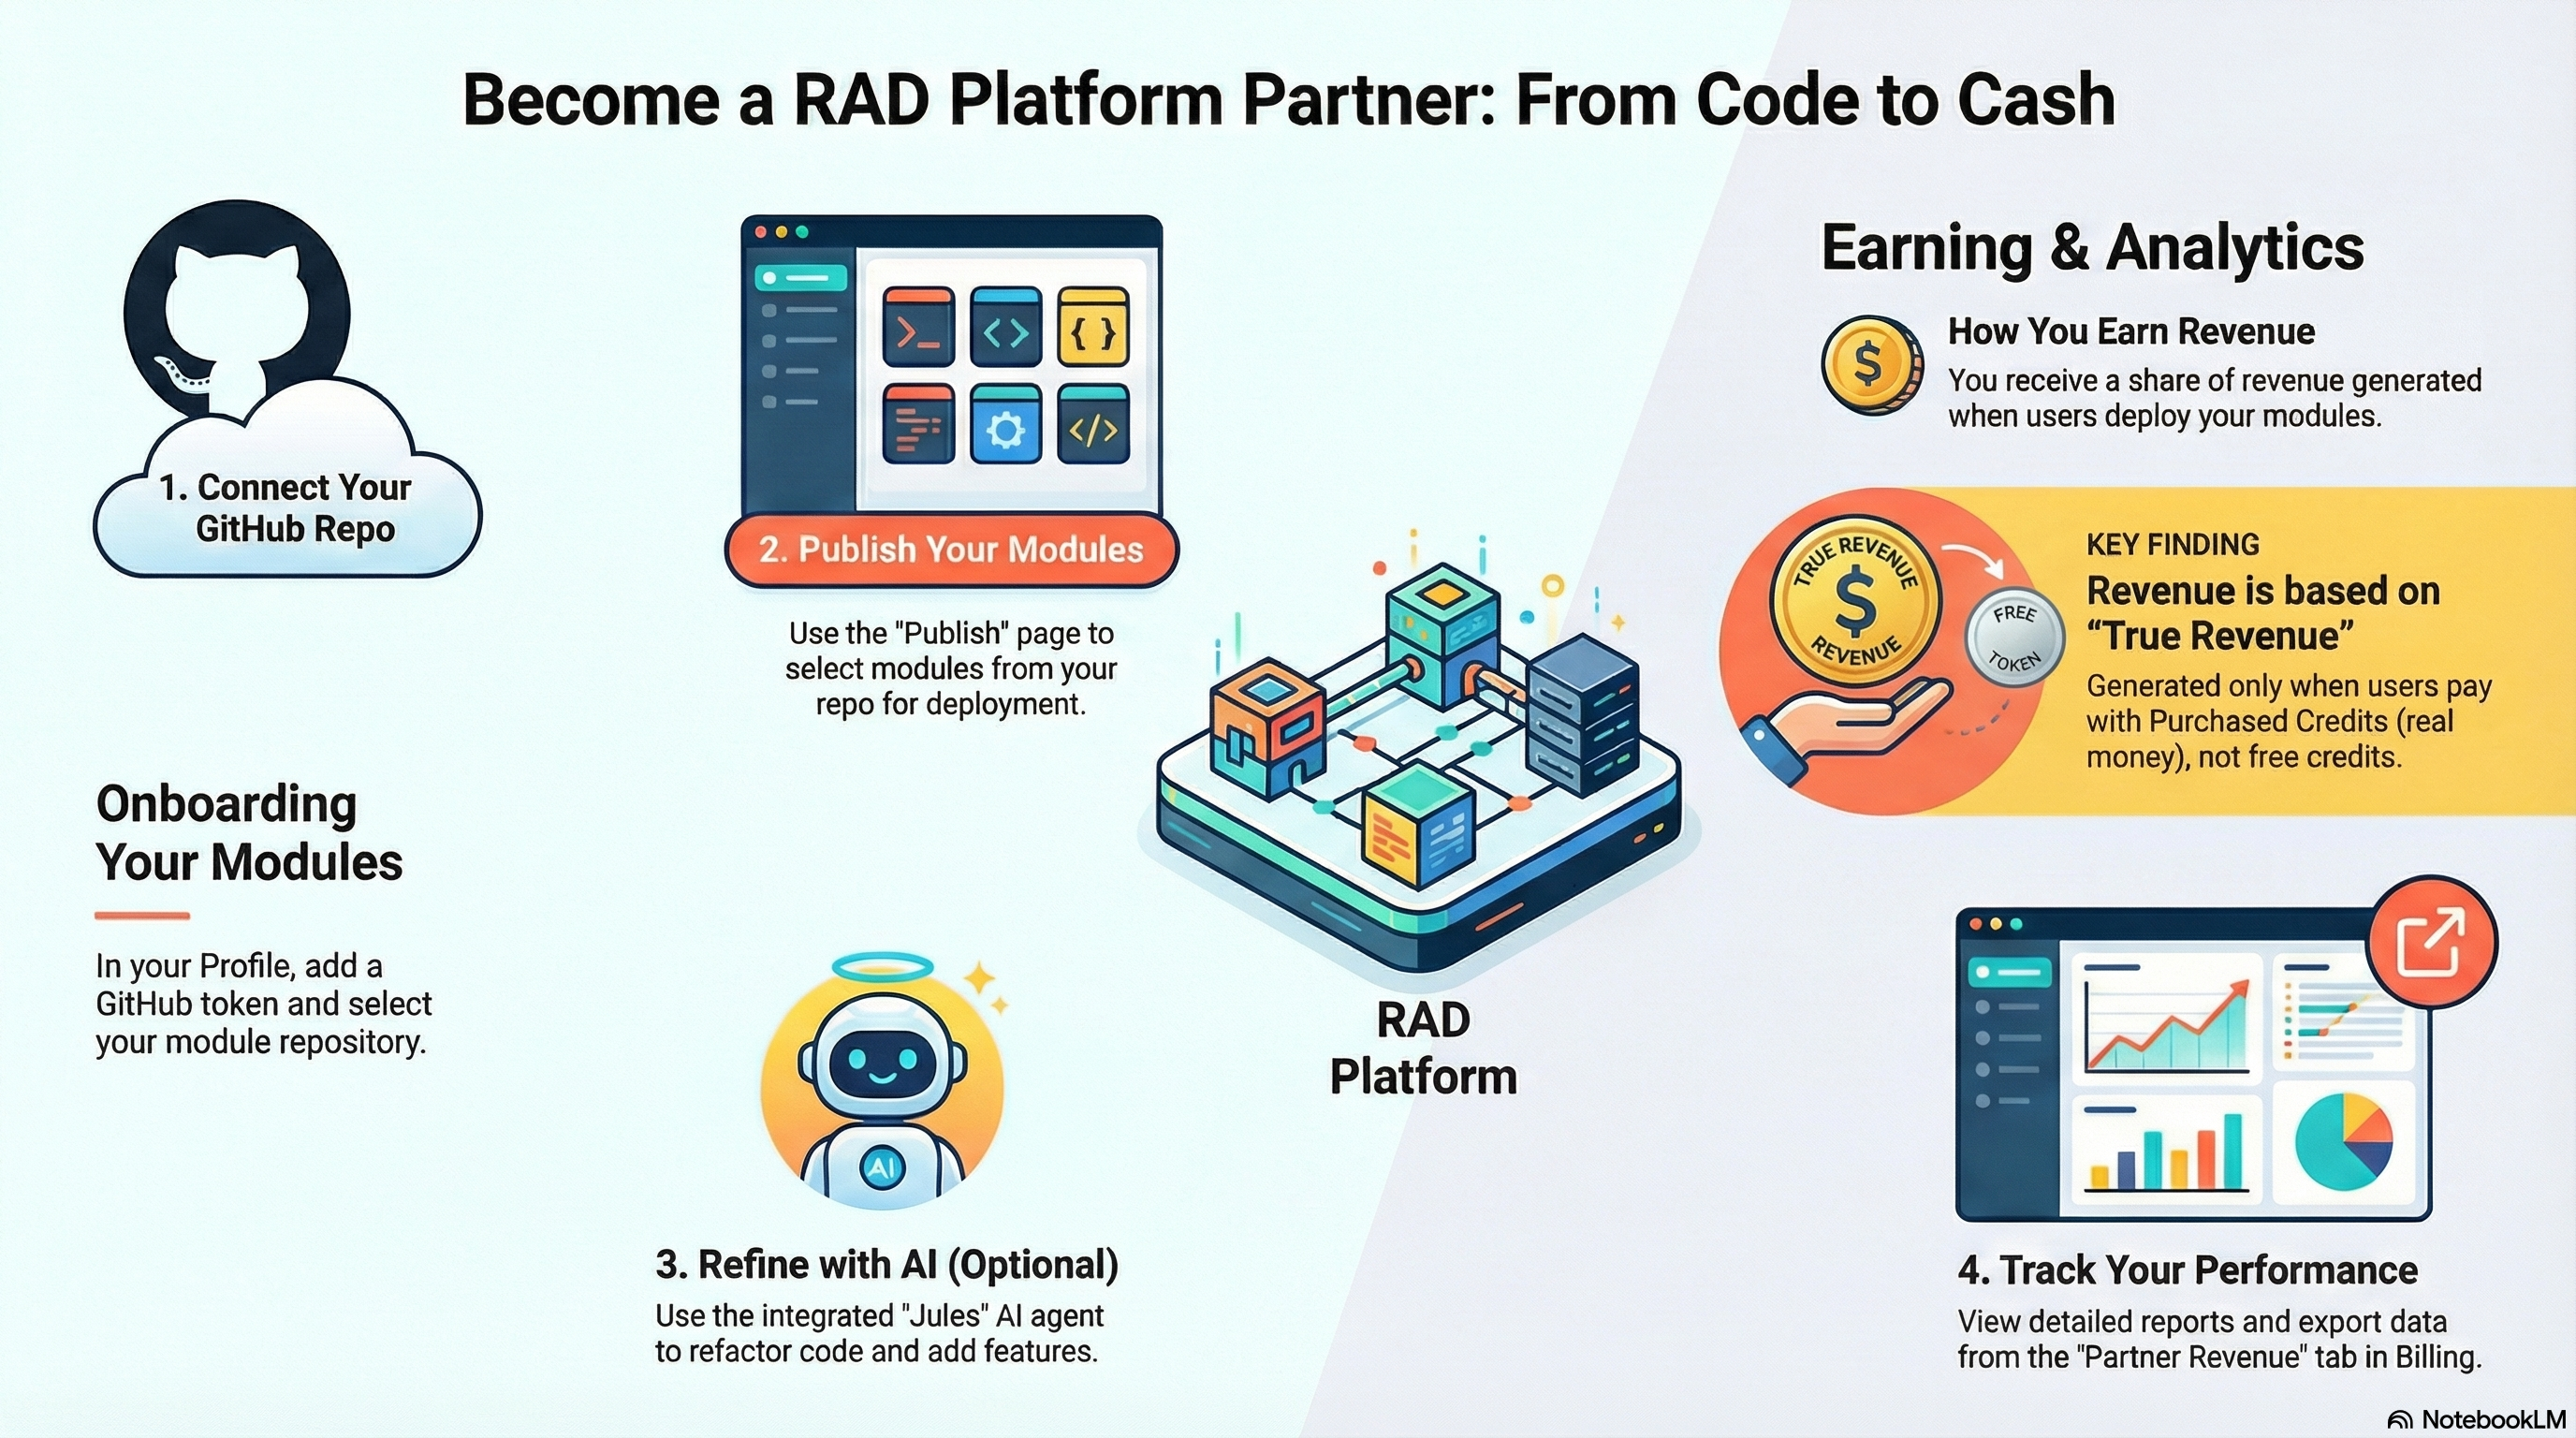
8. Earning Revenue
As a Partner, you can earn revenue when users deploy your modules.
- Partner Revenue Share: Administrators can configure a "Partner Revenue Share" percentage. This is the portion of the True Revenue generated by your modules that is allocated to you.
- True Revenue Calculation: Revenue is generated only when a user pays for a deployment cost using Purchased Credits (real money). Costs covered by free Awarded Credits do not count towards revenue.
- Tracking: If you also hold the Agent role or if permitted by platform policy, you can view your revenue on the Revenue page. Otherwise, revenue reports are managed by the Finance team.
9. ROI Calculator
Access the ROI page from your navigation to use the interactive Return on Investment calculator. This tool helps you estimate cost and time savings by comparing RAD's automation against manual deployment workflows.
10. Data Visibility
As a Partner, you have a focused view of the platform.
- Your Data: You can see your own deployments and the modules you have published.
- Platform Data: You can see public platform modules available to everyone.
- Privacy: Other partners cannot see your private modules or deployments. Only System Administrators have access to view all deployments across the organization.
11. Profile & Notifications
Click your avatar in the top right to access your Profile page:
- Notification Settings: Toggle Deployment Notifications and Billing Notifications on or off.
- Partner Settings: Manage your GitHub Token, Repository, and Jules API Key.
- Account Management: Delete your account if needed (requires email confirmation).
- Theme: Toggle between Light and Dark mode using the sun/moon icon in the navigation bar.